Using Kaggle
Contents
Using Kaggle#
If you are in China or another region with difficult access to JupyterHub and Google Colab, you can use Kaggle as a substitute for launching an interactive coding environment where you can write and run code. Please note that we recommend JupyterHub if you can access it.
First use#
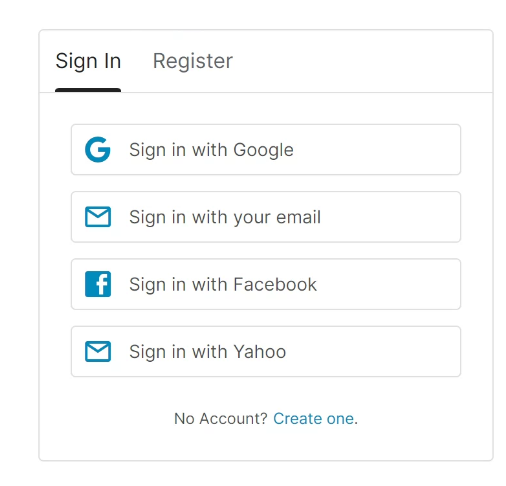
1. First, sign in to your Kaggle account. If you don’t have a Kaggle account, create one by registering here.
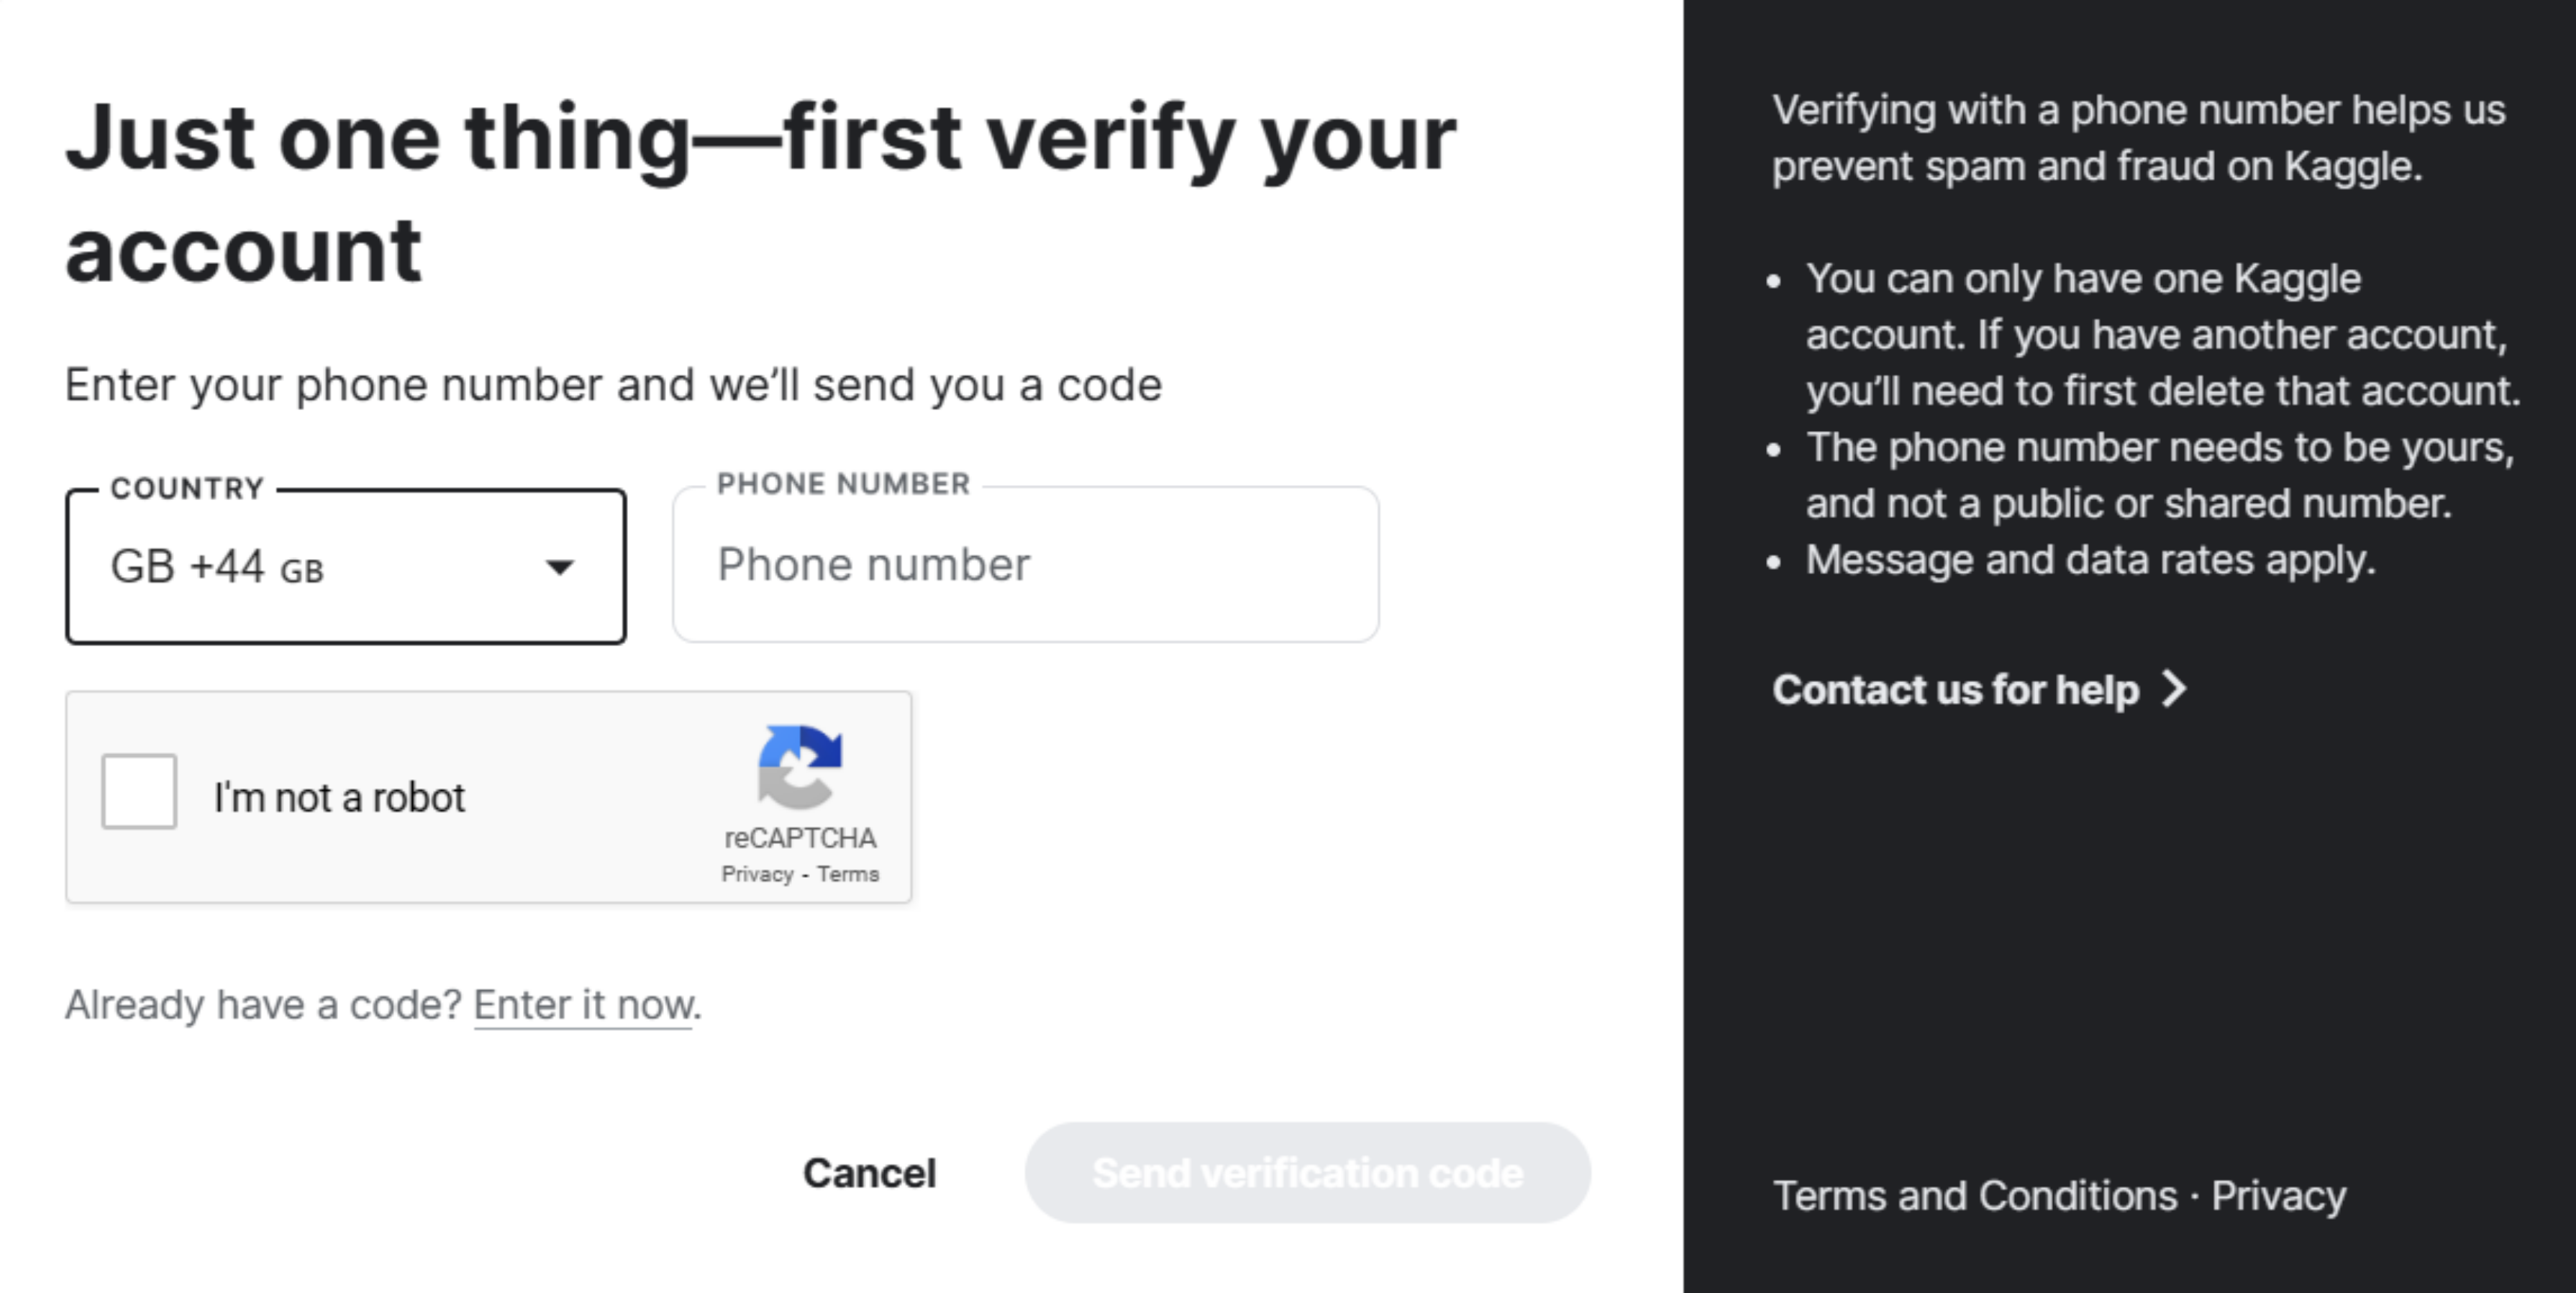
2. Get your account phone-verified. This is necessary for accessing GPU/internet on kernels, as well as for collaborative work. To do this:
click on your profile icon in the top right corner

select
Settingsand scroll down to thePhone verificationsection

enter your phone number and subsequently the code verification code received in a text message
Accessing course notebooks#
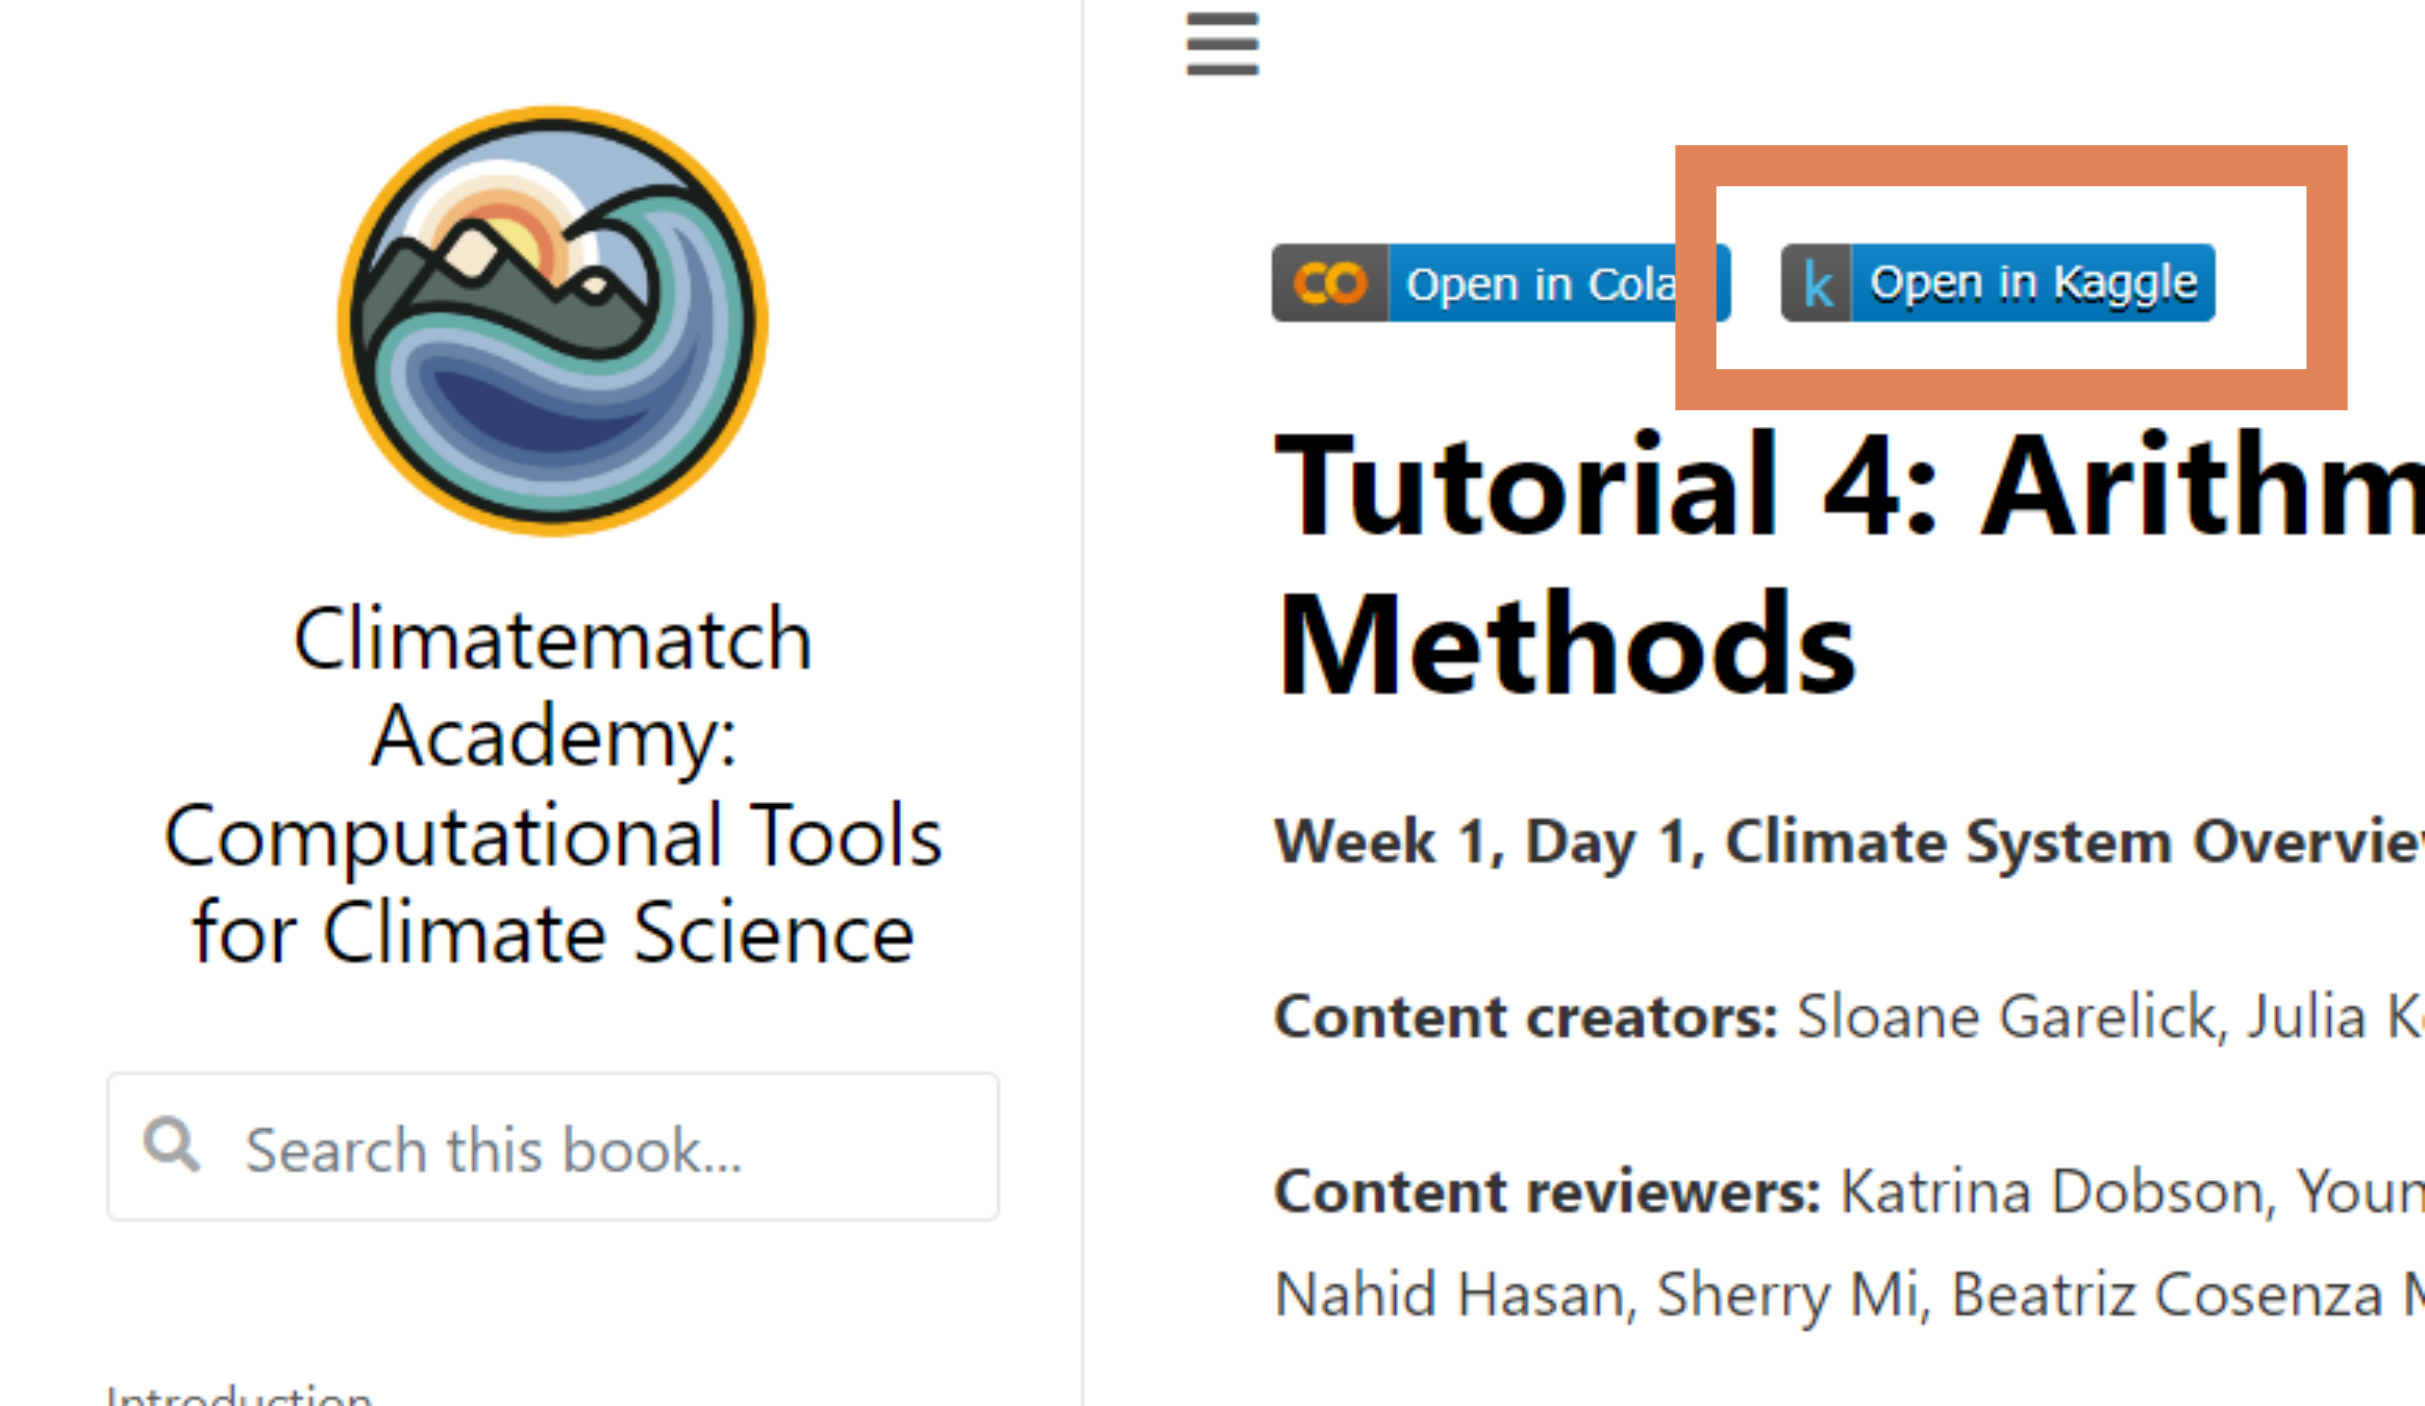
Click the kaggle button found on top of every page containing a jupyter notebook, such as tutorial pages.
NOTE: If you receive an error asocociated with
!pip install, follow this workaround.
Enabling internet access on kernels#
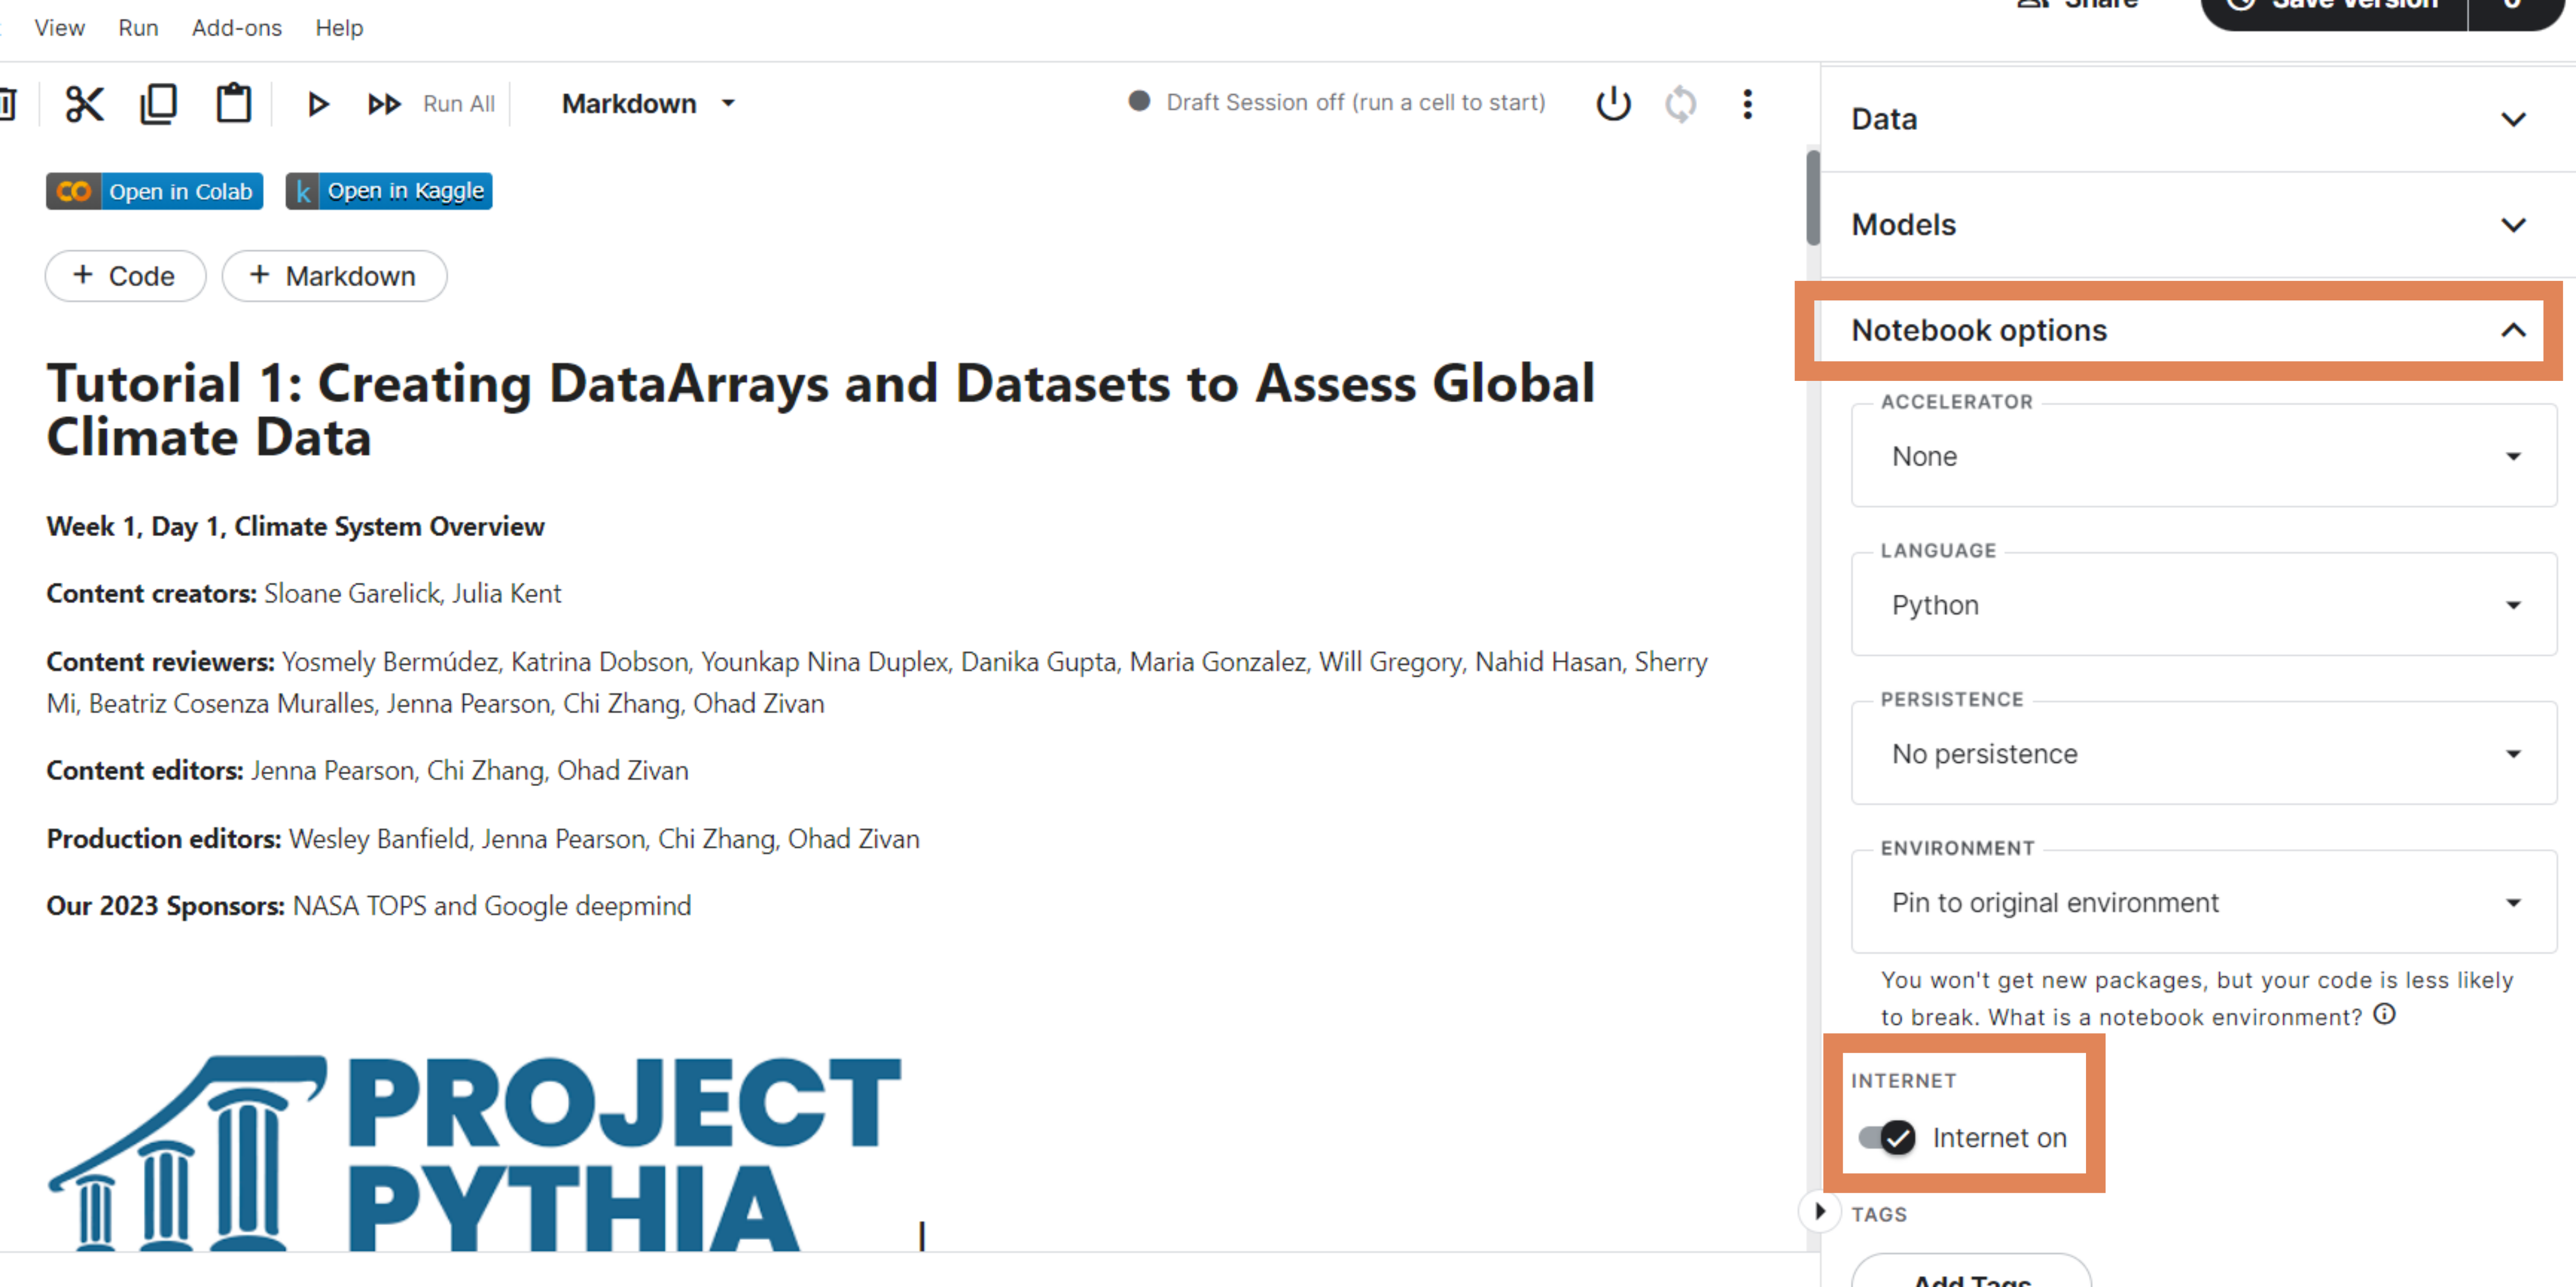
To enable this, click on Notebook options in the right side bar of the kaggle notebook editor. Scroll down and toggle Internet on.
This will let you fetch data from an external online source or install a custom python package. If after the installation you experience any error when trying to import an installed module, make sure to restart the kernel after installing the module and then it should work.
Enabling GPU access on kernels#
Click on Notebook options in the right side bar of the kaggle notebook editor as above. Change Accelerator from None to GPU.
NOTE: A GPU is NOT required in the Computational Tools for Climate Science course! However, some advanced groups might design projects that benefit from GPU use.
Collaborating in kaggle#
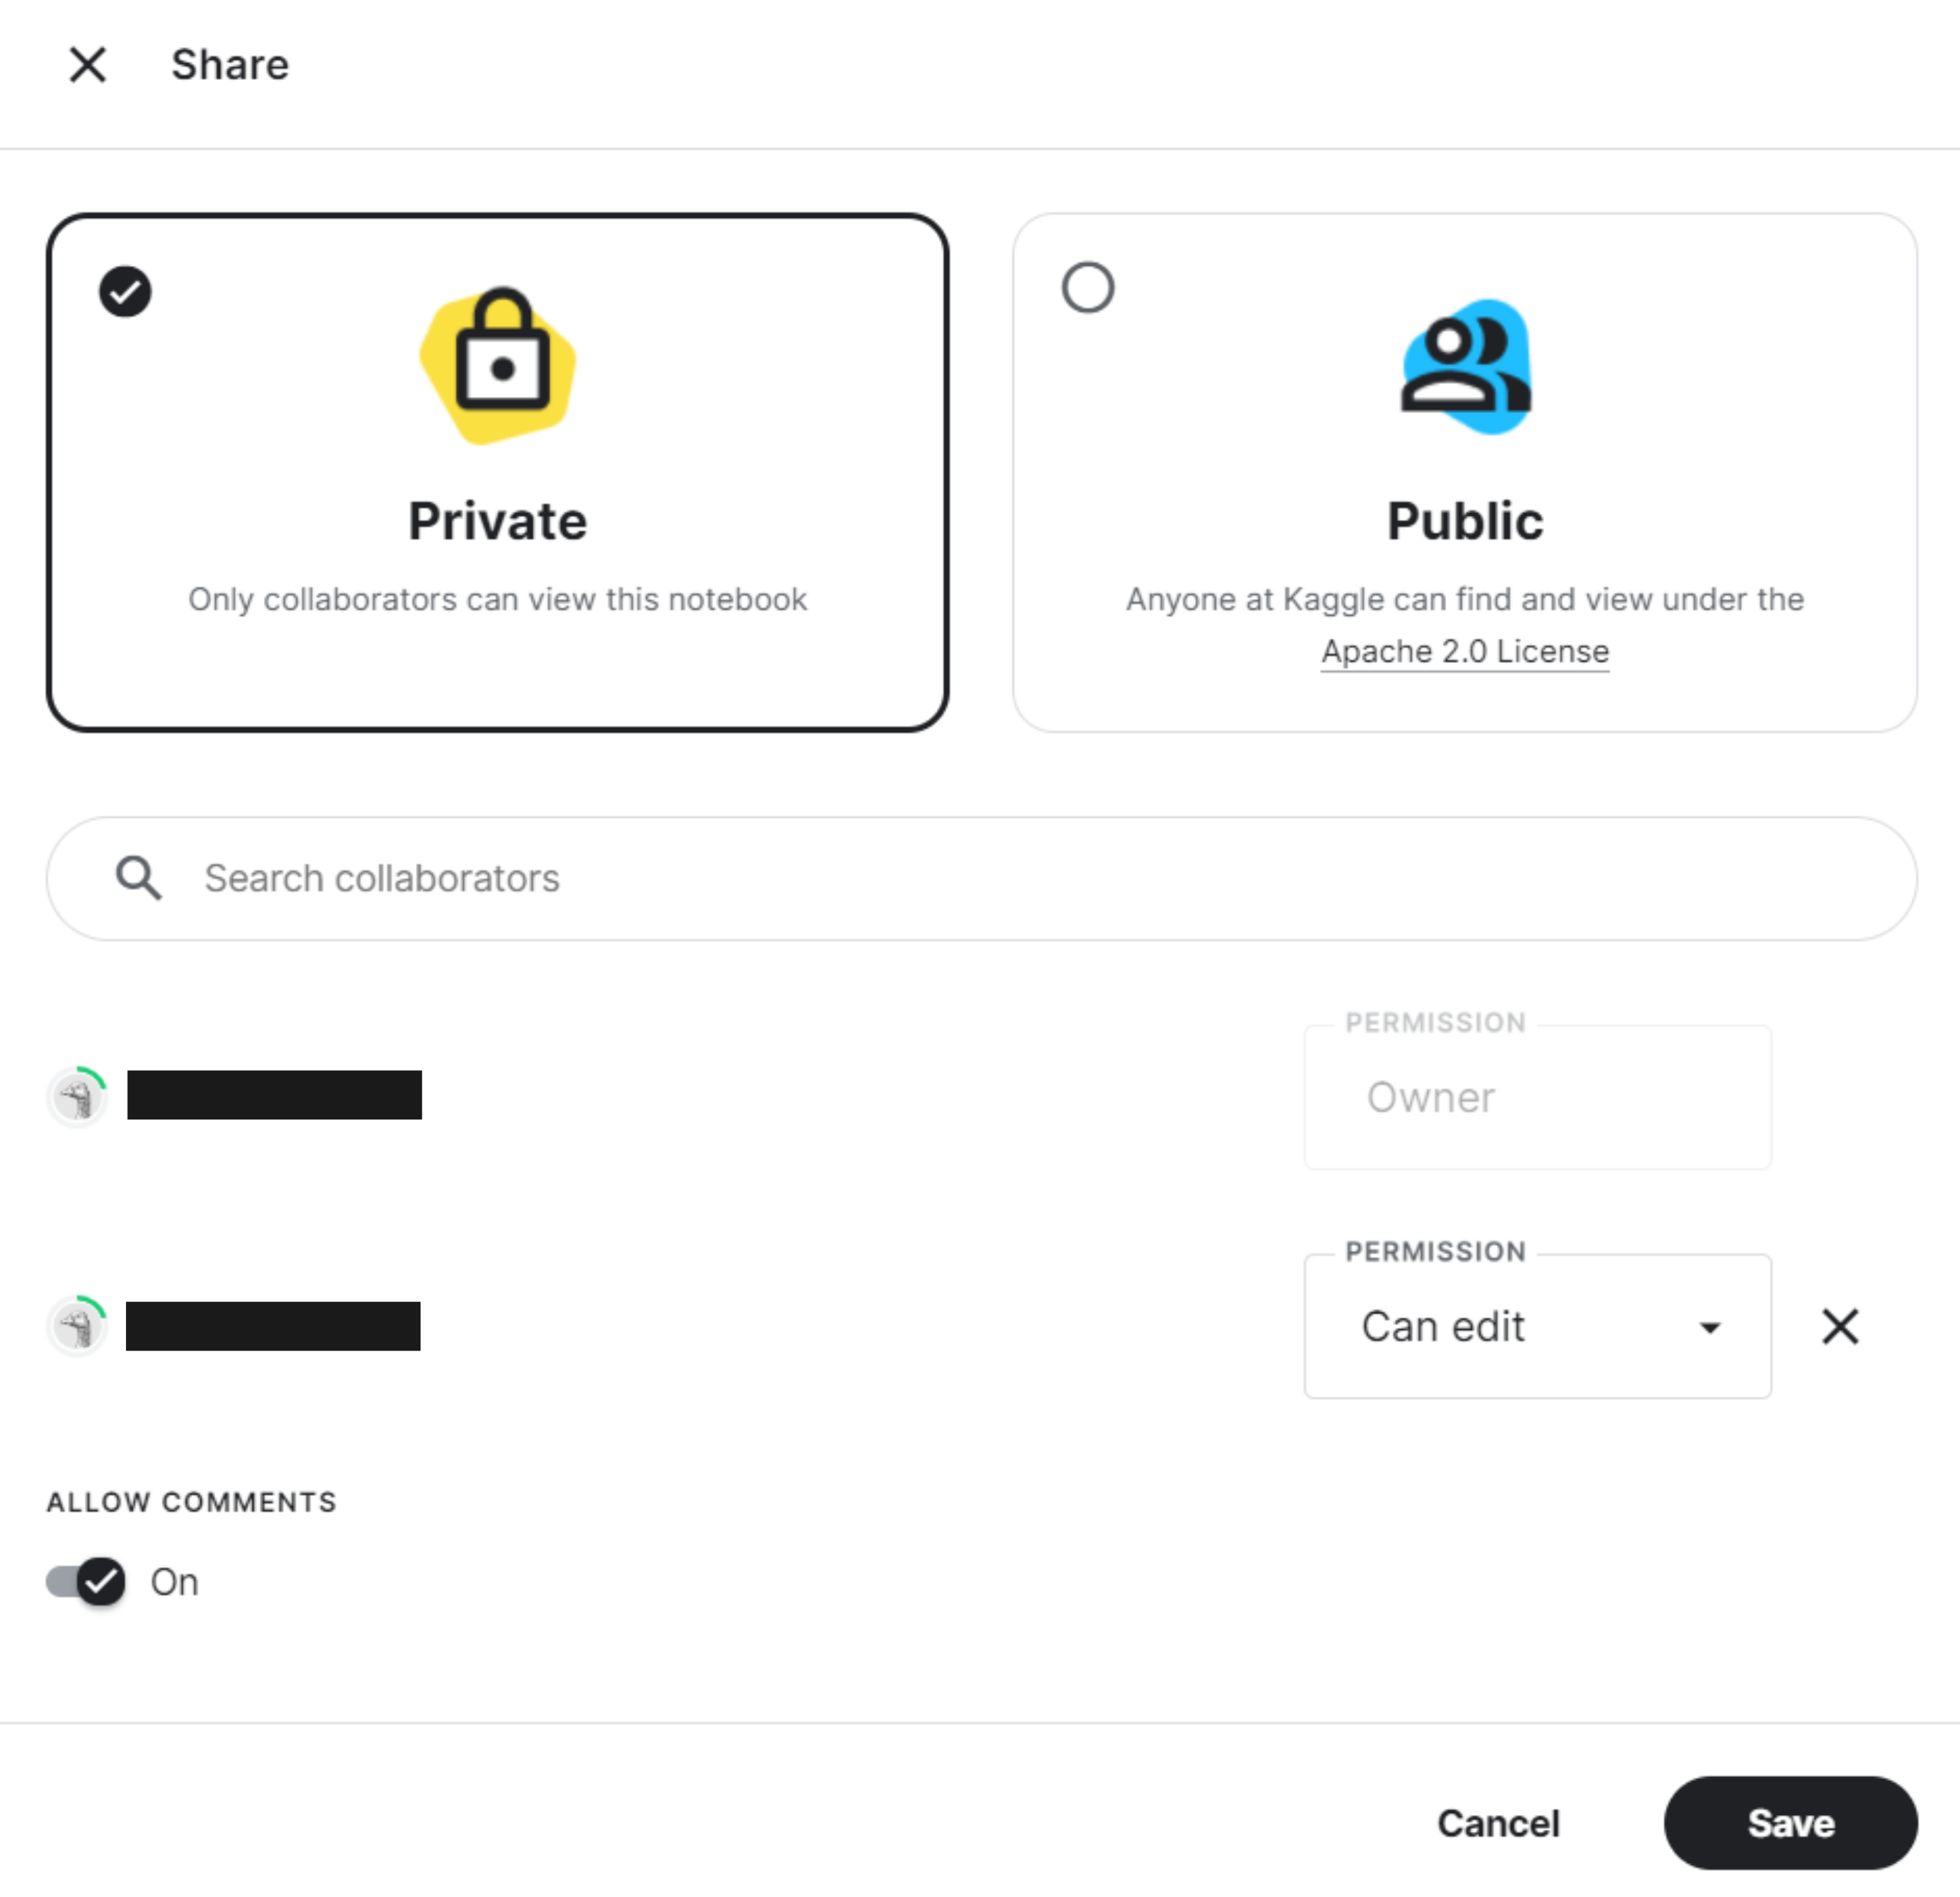
To share a notebook with your project teammates, add them as collaborators by clicking Share in the top right corner of the notebook editor when you have the notebook of interest open. Keep the notebook as Private and search your teammates by their kaggle username. You can give them access to view or edit your work. This is also where you can enable comments for your notebook.
NOTE: Unlike in Colab, collaborators CANNOT edit the same version of a notebook simultaneously! Your edits will be accessible to collaborators only after you
Save version->Save & Run All (Commit), but they will not get merged into their working version of the notebook automatically. Commits from separate notebook versions must be merged manually!
To view your collaborators’ work, open the version history by clicking on the number next to Save Version in the top right corner. Clicking on the three dots next to a specific version lets you view, rename, and pin it, as well as revert to it or compare it to another version.
